
Step by step instructions with screenshots to designate a project as active or inactive.
In Billing Link, you now have the ability to designate projects as Active or Inactive.
Notes:
- By default, all projects are set as Active.
- Only Active Projects will be displayed on the Projects Summary Report.
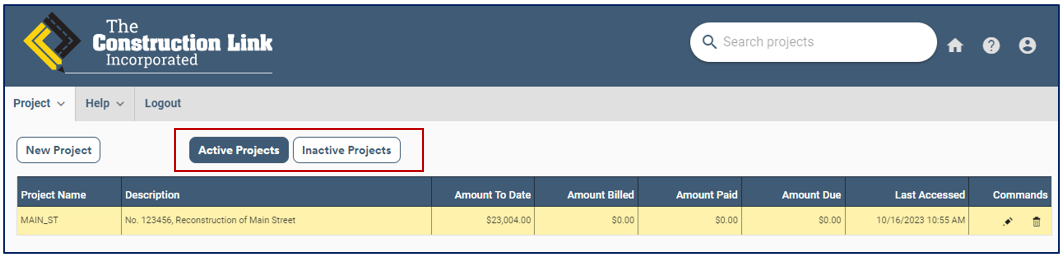
View Active Projects or Inactive Projects
All projects are located on the Homepage.
- To view Active Projects, simply click Active Projects.
- To view Inactive Projects, simply click Inactive Projects:
To change a project's status
There are two ways to Inactivate a project within Billing Link
Trash Can Icon
On the Homepage in Billing Link,
- Select the Project you would like to change to highlight it.
- In the column labeled Commands, click the Trash Can icon.
- Note: Clicking the Trash Can icon on the homepage does not delete the project, it moves it to Inactive. To completely delete the project, it first has to be Inactive.

- A Confirmation Message will appear. To confirm that you'd like to set the project as inactive, click OK:

The project will now be archived.
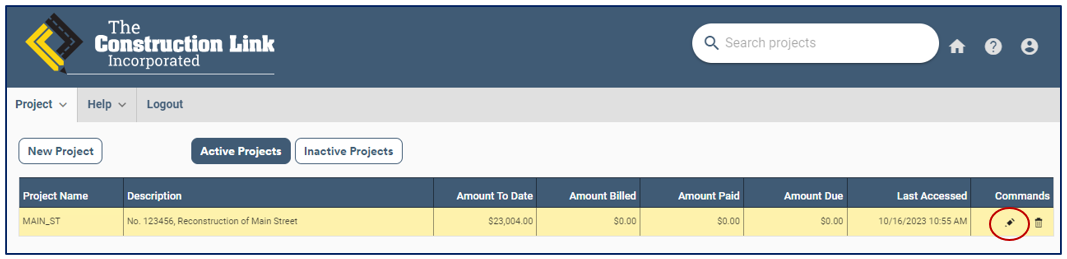
Pencil Icon
On the Homepage in Billing Link,
- Select the Project you would like to change to highlight it.
- In the column labeled Commands, click on the pencil icon in the project's row:
- The Edit [Project Name] window will appear. To make the project Inactive, uncheck the box below Active and click SAVE:

This project will now only show under Inactive Projects. To change it back to an Active Project, add a checkmark on the Project's Properties window.