Before You Start
- Ensure there is an available license on User Management Link
- Ensure you know your TCLI ID, downloads page password, internal server name/IP Address, and Server Password (if applicable).
Step 1 - Install Estimating Link (skip to Step 2 if the software is already installed)
Download Estimating Link on the new user's pc via The Construction Link's Customer Portal. Enter your Username (CLI #) and Password (assigned by TCLI).
While in the Customer Portal, click on EL3_Setup.exe and the downloading process will begin:

If the install does not begin automatically, open file explorer in windows, then select downloads and select EL3_Setup. Right click on it and select "Run as Administrator."
Follow the prompts to install Estimating Link. When the install is complete, launch Estimating Link and enter your TCLI ID and password.
The user now has access to Estimating Link and is currently connected to the local database on the PC.
Step 2 - Add Your Company's Server Database
After you have installed Estimating Link, you will need to point it to the server.
In Estimating Link, select Setup > Options > Database > Add:
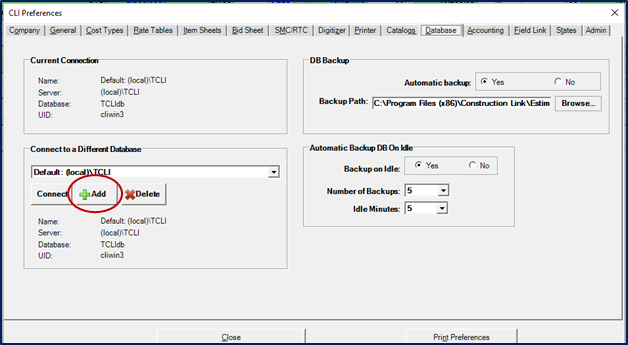
An Add Connection window will be displayed:
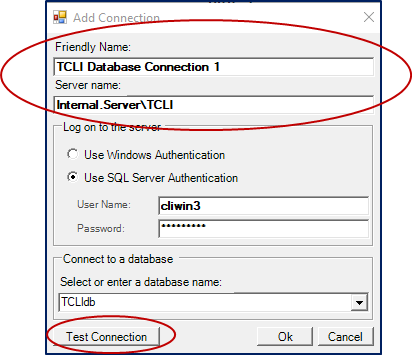
In the Friendly Name field, enter a name you'll recognize as your internal company server. An example is: Pleasant Company, Inc. Server.
In the Server Name field, Replace the text "(local)" with your server name or IP Address. DO NOT delete "\TCLI." Your Server Name should Look like this: "Server Name\TCLI."
🗒️Note: By default, the SQL Server Authentication is selected for logging onto the server. The User Name (cliwin3) and Password are pre-filled.
Click Test Connection. If the connection was successful, the below message will be displayed:

If the connection is not successful, the below message will be displayed:
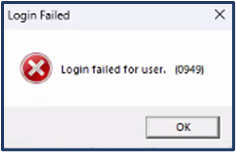
If you received the Login Failed message, change the option for logging into the server to Use Windows Authentication, and test the connection again.

⚠️Note: If your log in fails are following these instructions, contact your IT Department to verify your server name/IP address, and password is correct.
You have now added the server connection to your software.
Step 3 - Connect to the Server Database
Under "Connect to a Different Database", use the drop down arrow to view your connections and select the new connection you just created.
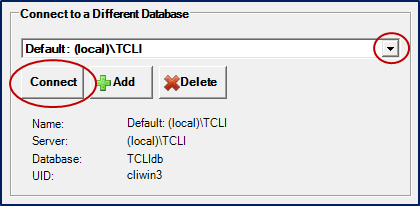
A message will pop up letting you know that the connection was successful and your server name will show. You will be forced to restart Estimating Link to make the final connection to the server.
You're Connected!
- your Company's projects will be available to you in the software. You can find them via the project explorer or by going to File>Open Existing Project.
- Go to Help > About. In this window, the Current SQL Server will show your internal server name
If you additional assistance with this process, please reach out to us anytime. (800) 448-0741 and/or Support@TCLI.com.