Overview
A Catalog is a central location to store pre-built Items that can be used to quickly generate a new project with items and costs associated with them. Multiple catalogs can be created for managing different types of construction work or different locations of work.
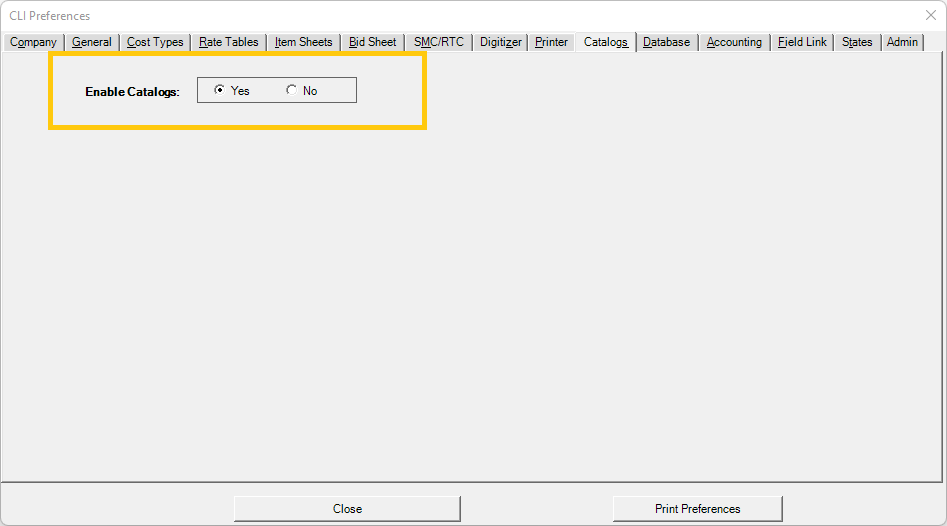
Enabling Catalogs
By default, Catalogs are not enabled within Estimating Link®. To enable catalogs, go to Setup>Options. Click the Catalogs tab and enable catalogs. After closing the Options window, you will need to restart the program for the changes to take effect.
Accessing Catalogs
To access catalogs within Estimating Link®, go to the File>Manage Catalogs. This will put Estimating Link® into Catalog Mode, which means that there will be a navigator control on the left, and a content panel on the right part of the screen. Entering Catalog Mode will close the Active Project, if there is one.
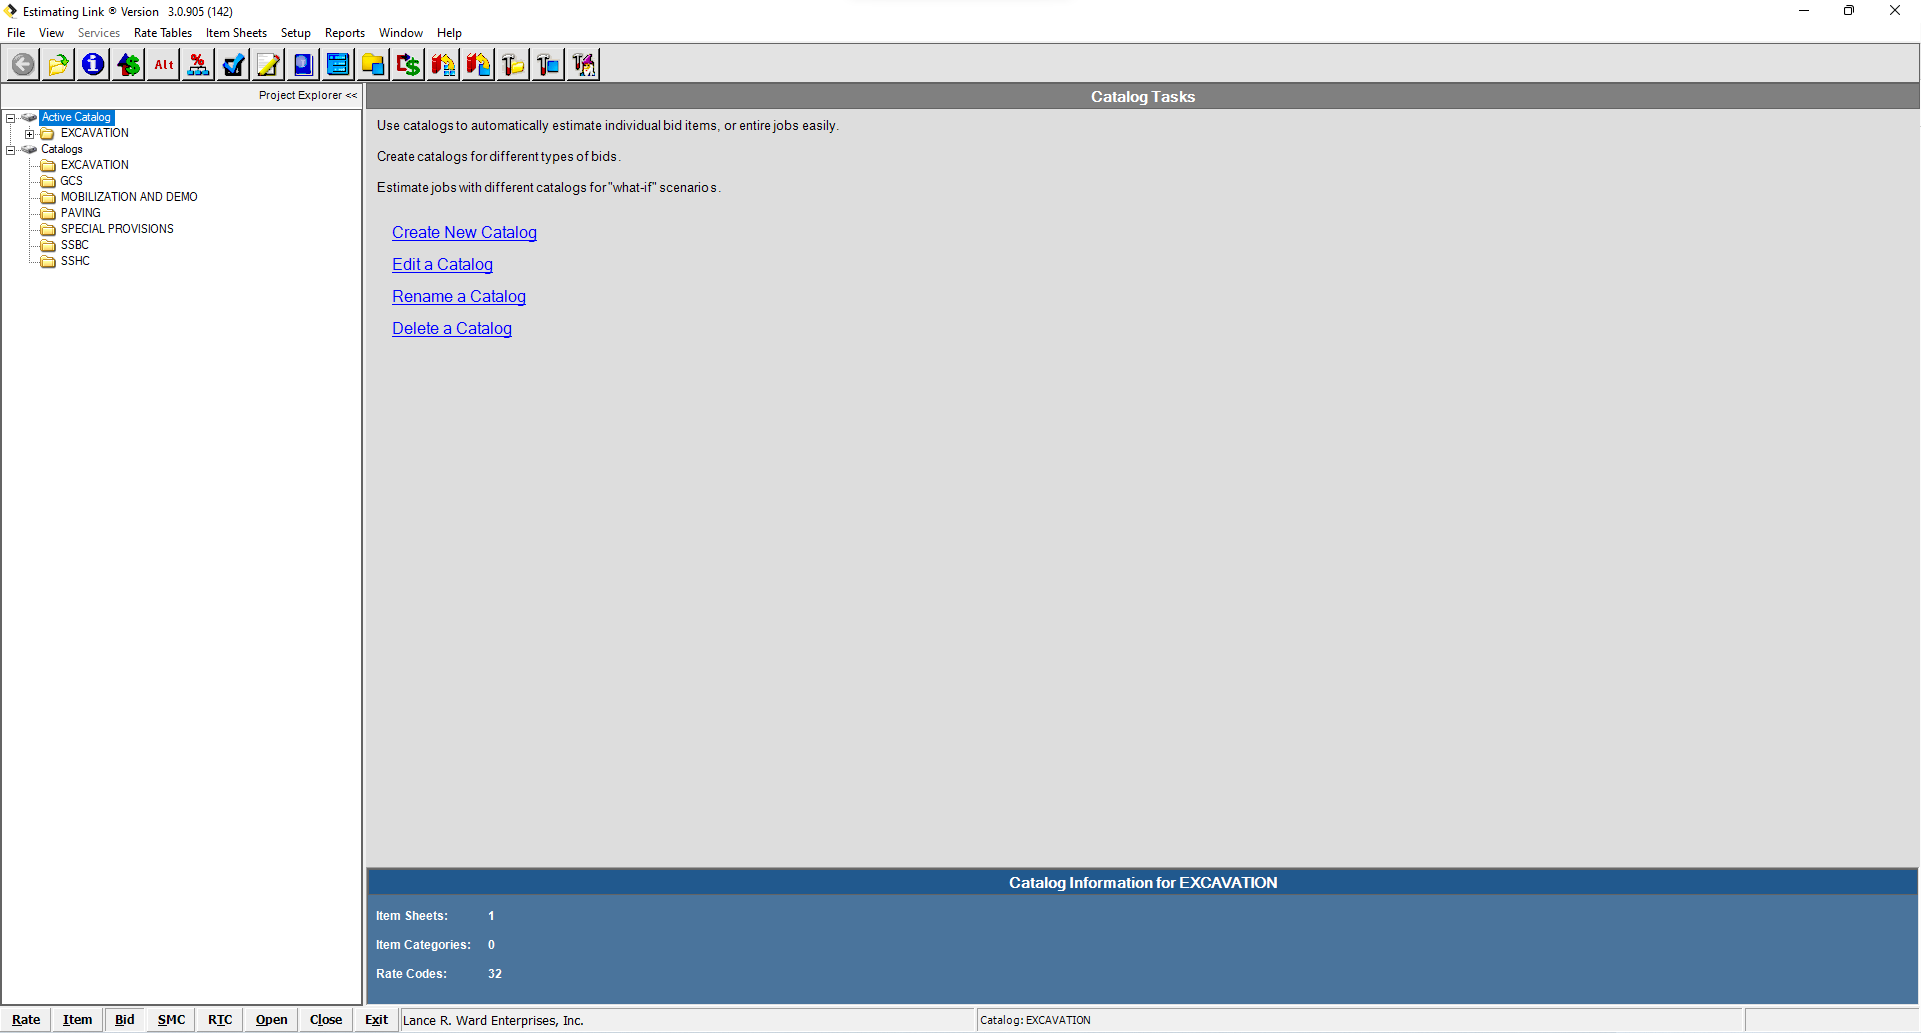
When you first enter Catalog Mode, you will be in the Catalog Tasks panel. You can Create, Edit, Rename, or Delete a Catalog. All of these functions are very similar to the project management screens that you are already familiar with.
🗒️Note: If you leave the Catalog Tasks window and need to get back to it, click the “Catalogs” option at the very top of the navigator control to return to this screen at any time.
Creating Catalogs
Click "Create New Catalog" on the Catalog Tasks panel (gray area) to create a new catalog.
- Create the Name of the Catalog. Description and Location are optional.
- Click Ok
- The new catalog will appear in the Tree View on the left.
💡Tip: You will notice a plus sign icon to the left of the newly created catalog. Click the plus sign icon, and you will notice that two sub-levels are available for Rate Tables and Item Sheets. This tree view functions just like the tree view in the Estimating Link® Bid Module.
Item Categories
Multiple Catalogs can be created for categories of work. For example a catalog could contain one category of all your “Excavation” items and another category of all your “Paving” items. The use of categories is entirely up to the user(s) and is intended to help sort and locate items easily.
Adding Items to Catalogs
Items that you want to save from a particular project can easily be "sent" to the Catalog of your choice. You can send singular Items or every item in the Project to a Catalog.
Save a Single Item to a Catalog
- From either the Bid Sheet or the Item Sheet, select the
 Icon in your Icon Tray to send the "current" Item to a Catalog.
 - Click the Catalog you want to save your Item in, and click OK.

- A window will appear confirming the Item was sent to the selected Catalog. Click Ok.

Save a All Project Items to a Catalog
- From the Bid Sheet, select the
 Icon in your Icon Tray to send All Project Items to a Catalog. Follow the same process as above.
Building Bids From Catalogs
Building From Catalogs is a simple import, much the same way as you import items from your master template or other projects.
- Create a New Project by starting with a Blank Project

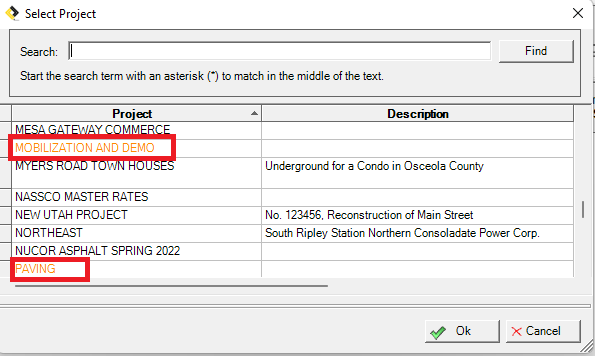
- Go to the "Services>Import>Items from Another Project"

- A Project List Pop-Up Window will appear. The Catalogs you have created will be included in the list in orange font. Find your catalog and click "Ok."
- The next window will present a list of pre-built items inside the Catalog you just selected. Check the box next to the items you would like to add to your bid, or you can click on "Select All" to select all of the items to add to your bid. Once you have selected all the items you want to add to your bid, click "Ok."
C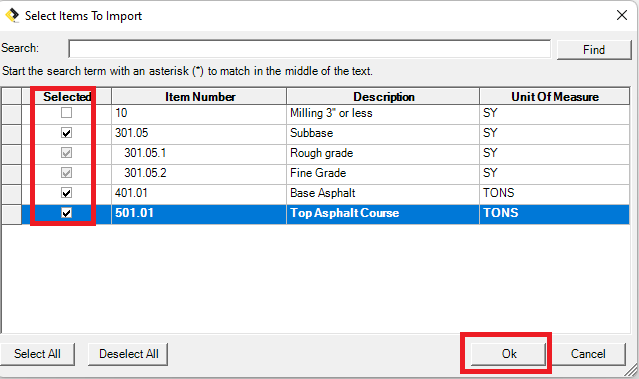
- Another Window will Appear, Allowing you to import the catalog item into your new bid using the takeoff quantity and Item # you choose. In the "Target Item", Enter the Takeoff Quantity. The Item # is an optional change. If you are ok with the pre-populated item # given from the Source Item, then no change is required.
NOTE: Make sure you check "Add to Bid Sheet" if you want these items added to the Bid Sheet. Otherwise, these items will be imported as Non-Bid Items.
- Continue this exercise until you have completed importing all the items you selected for your Bid.
- You have now quickly added your Pre-Built Items to your Bid Sheet.

If we can be of further assistance, please reach out to us at anytime: (800) 448 - 0741 or Support@TCLI.com.