Video tutorial and how-to article with screenshots to successfully build and modify crews
Overview
Crews give you the ability to assemble multiple rates into a single Crew entity. This allows you to select pre-built Crews for placement on Item Sheets, eliminating the need to individually select labor and equipment rates for common tasks.
What's in this Article
- Creating a New Crew
- Add Rates/Resources to a Crew
- Modify Crew Rates/Resources
- Reorder Crew Rates/Resources
Video Tutorial - 4 minute watch
Adding and Creating a Crew
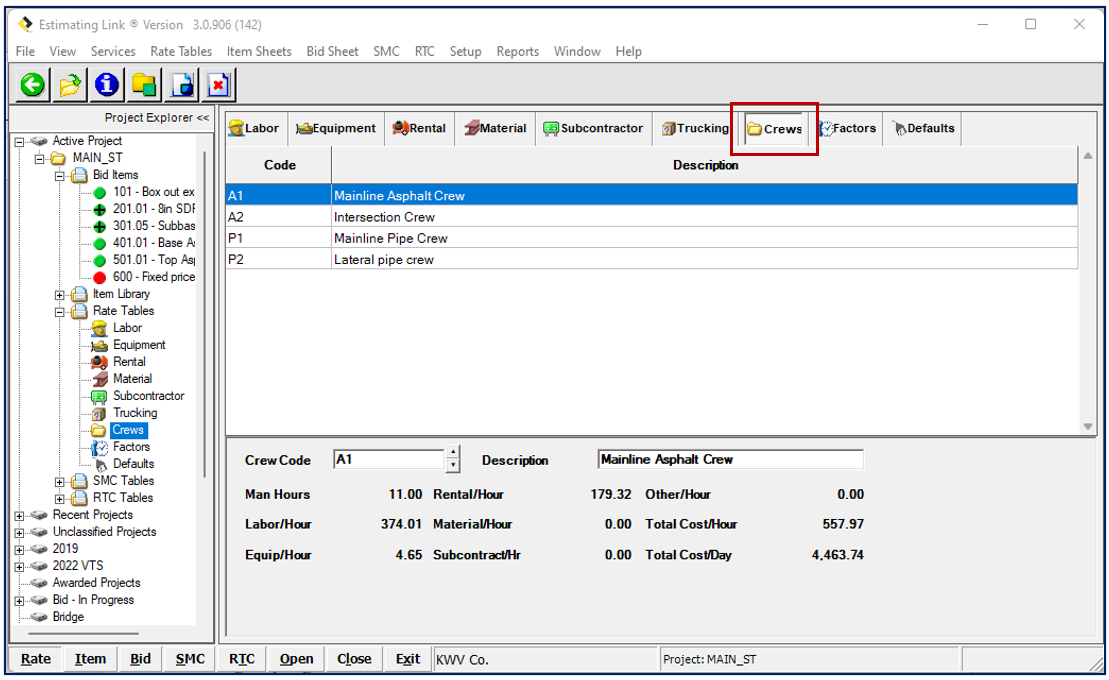
Navigate to the Rate Tables in Estimating Link and click the tab labeled Crews:
There are 2 ways you can add a Crew:
- Click on the New Rate Icon:
- Go to Services > New Rate:


After one of the above is completed, the bottom pane of the Crews window will have an empty fields for Crew Code and Description as shown below:

After you've entered at least a Crew Code (Description is optional but suggested), you will have the option to Post or Cancel. Select Post:

After you've clicked Post, your new Crew will be saved to the Crews Table.
Add Rates to a Crew
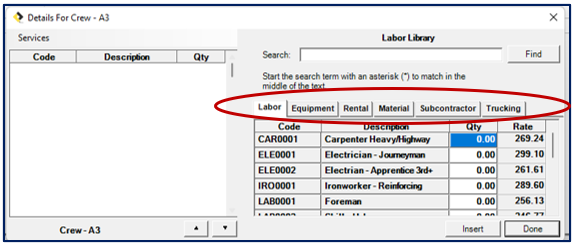
Double click the new Crew name in the table. This will open the Details For Crew - [Crew Name] window where you can add, update, or remove components of a Crew. The Details For Crew - [Crew Name] window is split into two sections:
- The section on the left is the Crew Component panel which shows the current Rates in the Crew.
- The section on the right is the Rate Library and contains all the Rates in the active project. The Rate Library is divided into a different section for each cost type. The individual sections can be accessed by using the tabs at the top of the Rate Library:
In the Rate Library, enter the quantity of that Rate and click Enter on your keyboard or click the Insert Button.
Tip - You can double click a Rate without entering a quantity and it will be added to the Crew with a quantity of 1.
*You can modify the quantity of the Rate on the left or right side of the window.
Tip - you can quickly search for Rates by using the Search and Find Function located at the top of the window:

Your Rate will now show on the left side of the Details For Crew - [Crew Name] window as shown below:

When you are finished assembling your Crew, click Done.
You will now have an analysis of the new Crew at the bottom of the Crew window as shown below:

Modifying Crews
In order to modify the components of a Crew, you need to open the Details For Crew - [Crew Name] window by double-clicking on the Crew in the grid on the top portion of the screen.
This will open the Details For Crew - [Crew Name] window where you can add, update, or remove components of a Crew.
In order to add a new Rate to the Crew, simply follow the same steps as above (double click or Insert and change the quantity either before or after).
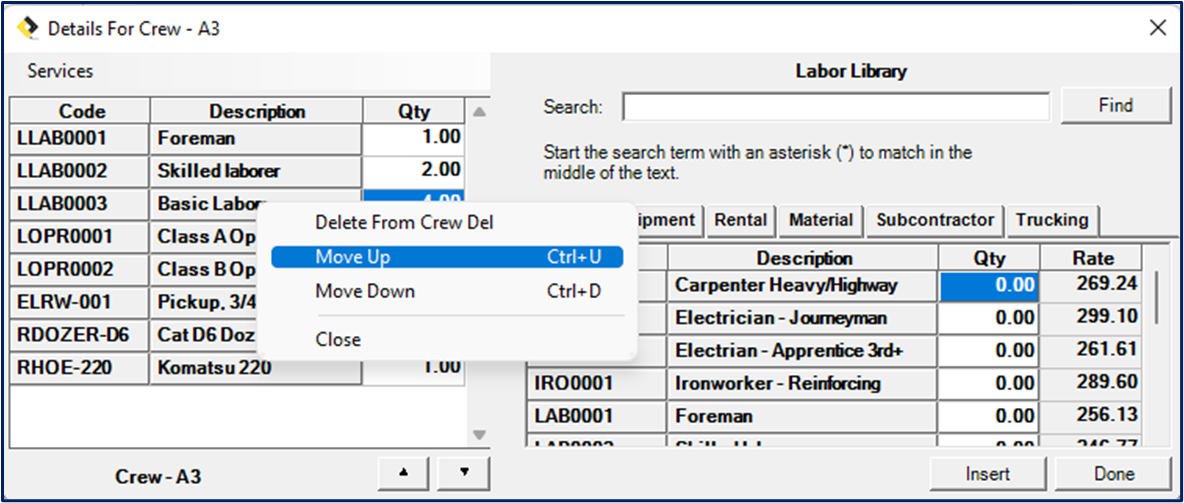
Deleting a Crew component simply requires right-clicking the Rate on the left side of the window and select Delete From Crew Detail as shown below:

Reorder Crew Rates
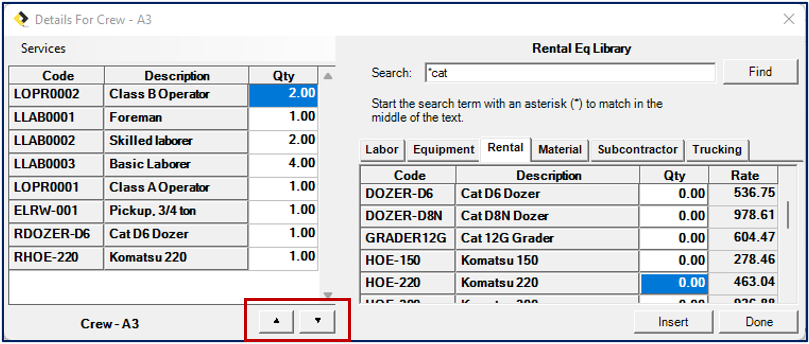
You can Reorder Resources in your Crew 3 different ways! This is a helpful feature because when you add this Crew to an Item, it will show in the order that you have on the Details For Crew - [Crew Name] window.
- Up & Down Arrows - Select the Rate you would like to move. Use the Up Arrow to move the Rate up or the Down Arrow to move the Rate Down:
- Right Click - Select the Rate you would like to move and Right Click. Select Move Up if you'd like to move the Rate up or select Move Down, if you'd like to move the Rate down:
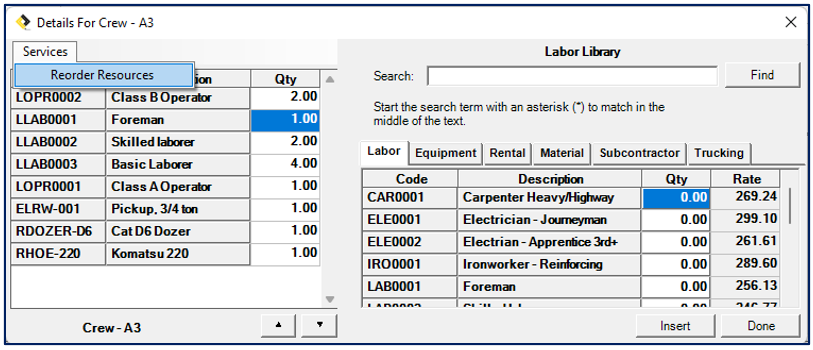
- Auto Reorder Resources - Click on Services > Reorder Resources. This will reorder your Rates first by Rate Category (Labor, Equipment, Rental, Material, Subcontractor, Other) and then by alphabetical order: