Overview
For each calendar day, time sheets are used to track the number of people working on a project, their time, equipment and material used, the quantity of work performed, and other relevant notes about the day's work (i.e. weather, issues, accidents, etc.)
Field Link is designed to provide visibility into quick jobs costs for field personnel to see on a day-by-day basis and compare that to the way the the project was estimated. It also provides the estimator with the manhours and costs of each phase of the project which can be used as a gauge for estimating similar phase costs on future projects.
Field Link is a web application, requires an internet connection, and can be used on laptops, tablets, or cell phones.
Field Link allows the Foreman to fill out an Electronic Time Sheet in similar fashion as they would a written time sheet. Individual laborers can also fill out timesheets, if that is the way your company operates. Timesheets track the Items that were worked on that day along with the employees, equipment, materials, subcontractors, and other resources that were used that day.
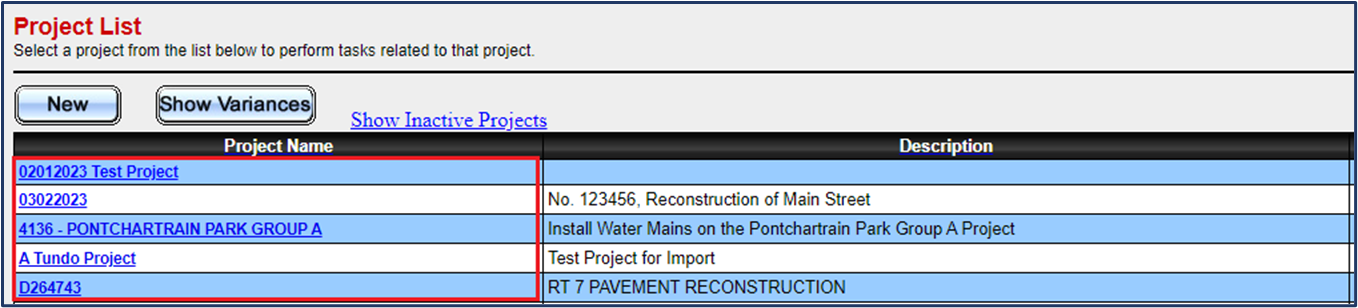
Step 1 - Select your Project
After logging into your Field Link Program, navigate to Projects. Select the project that you will enter a timesheet for by clicking on the Project Link.
⚠️Warning: The Project must be imported from Estimating Link or a spreadsheet to be visible on your projects page. To learn more about importing a project from Estimating Link, click here. To learn more about importing a project from a spreadsheet, click here.
Step 2 - Create a New Time Sheet
Select New Time Sheet from the Project Page.
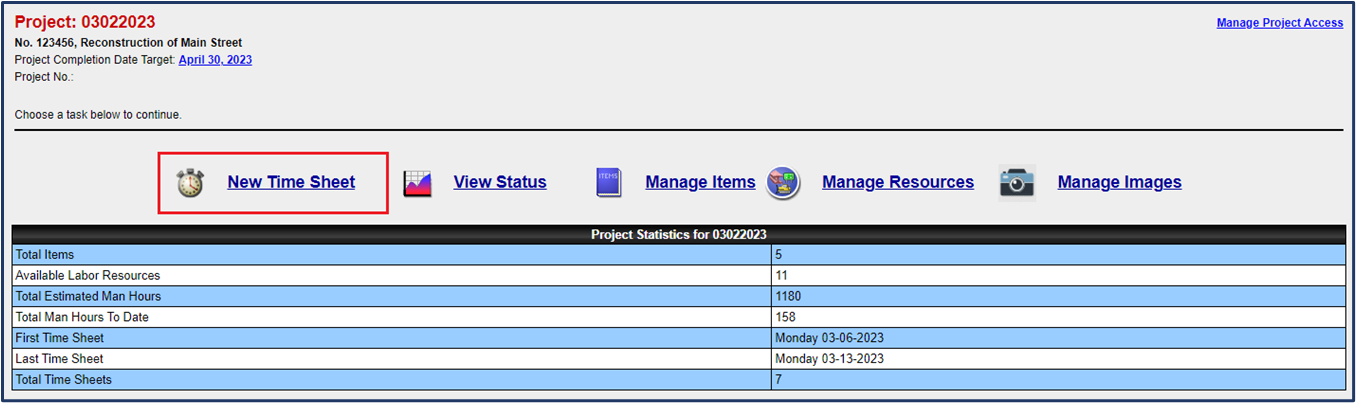
Select the Author and Date of the Time Sheet.
You will be directed to the timesheet, and it will be blank. This is where you will add items that were worked on as well as your resources (employees, equipment, etc.), production, and notes.
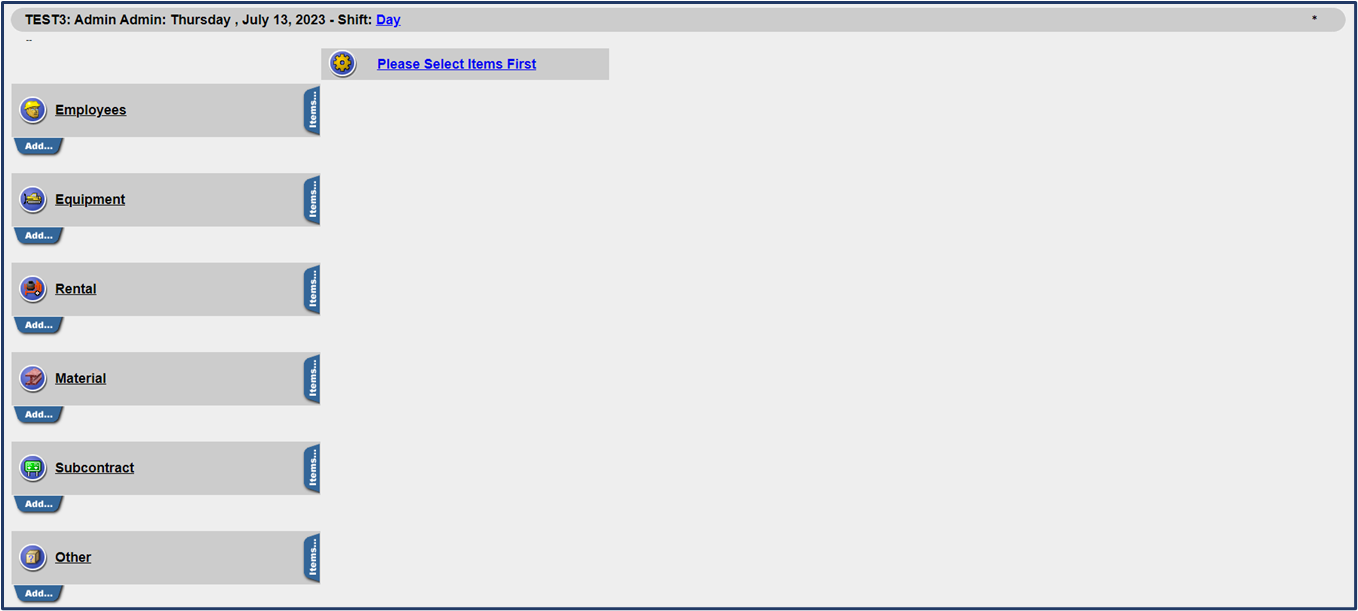
Step 3 - Add Items to your Timesheet
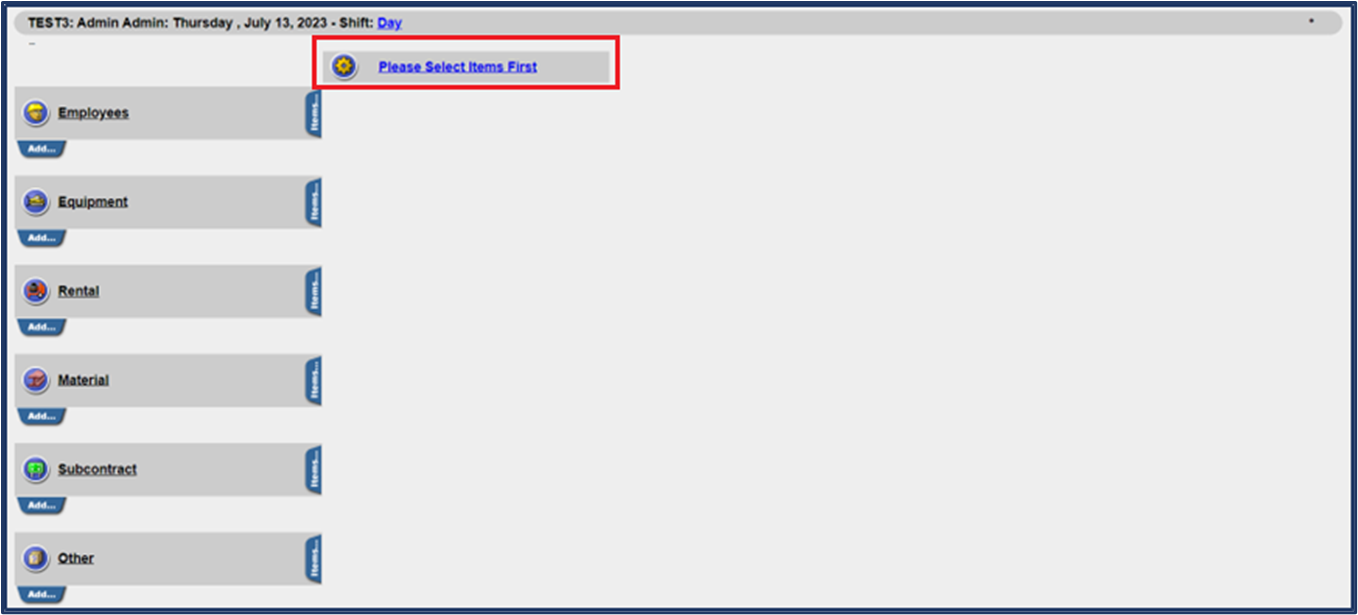
Click on Please Select Items First to add the Item(s) that were worked on for that day.
🗒️Note: This only has to be done on the first time sheet by this author. The items you add will carry over to new timesheets created for days following.
A selection of items will appear in a pop-up window. Check the boxes beside the items you want to add to the timesheet, and click Save.

🗒️Note: If Auto Populate is turned on in your settings, the timesheet will be filled automatically with the default classifications estimated on the Items selected.
The auto-populate feature is OFF by default when you purchase Field Link. If you inadvertently turned this feature on and would like to turn it off, go to Admin>System Options. Select NO for the Auto-Populate option (first option listed).
Step 5 - Add Employees to your Timesheet
Under Employees, click Add to input the employee(s) on the project.
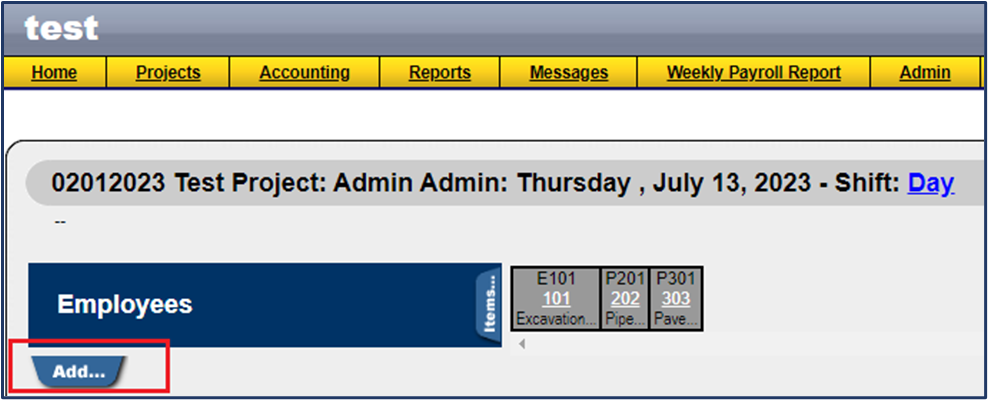
Click the Checkbox by the employee’s name and click Save.
🗒️Note: the employee's default classification will be listed next to the employee and will be added to the timesheet when you add the employee. To change or add multiple classifications to the employee, see below

Enter time for an employee under the corresponding item. R for Regular hours, OT for Overtime.
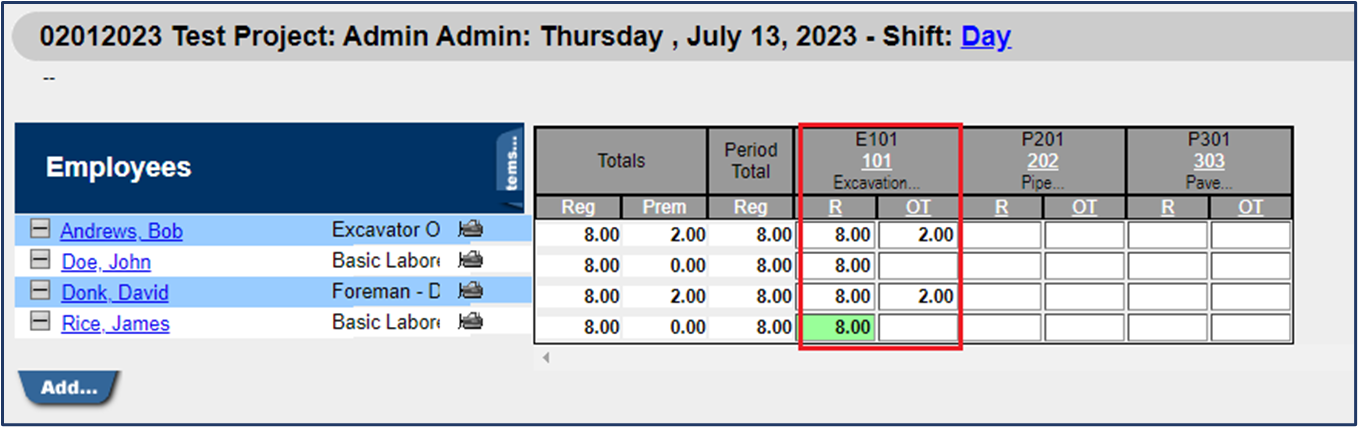
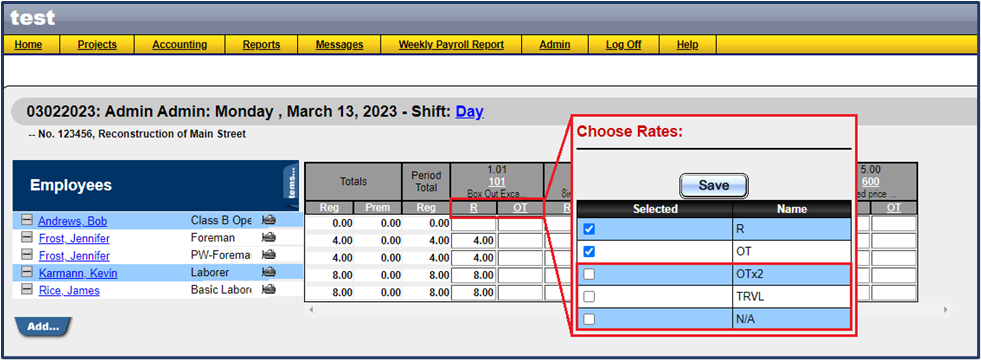
💡Tip: To add additional time entry columns to your timesheet, click on one of the current column headings (R or OT). A pop-up window will appear. You can select the additional column headings to add to your timesheet.
Change Employee Classification on Timesheet
If the employee is working inside a labor classification that is different from their default classification, you can change the classification of that employee once they are listed on the timesheet.
- Click the Employee's Name.
- Select the Class for the employee in the dropdown list.
- Click Save.

Adding Multiple Classes for same employee to timesheets
Field Link offers the ability to add employees to multiple classifications to the same timesheet. For instance, if an employee works 4 hours as an operator, and 4 hours as a skilled laborer, you can add this time by classification to the same employee.
- Click the Employee's Name.
- Select the Class for the employee in the dropdown list.
- Click Duplicate.

💡Tip: Remember that clicking Save changes the classification for the employee. Clicking Duplicate adds a classification for the employee.
Step 6 - Add Equipment, Rental, Material, Subcontractor, and Other to your Timesheet
To complete the timesheet, enter Equipment, Rental Equipment, Material, Subcontractor and Other by clicking Add underneath each resource.
💡Tip: In the Selection window for Equipment, Rental, Material, Subcontractor, and Other, you can sort your lists by column by clicking the heading link of each column. This makes it easier to find a resource.
Equipment
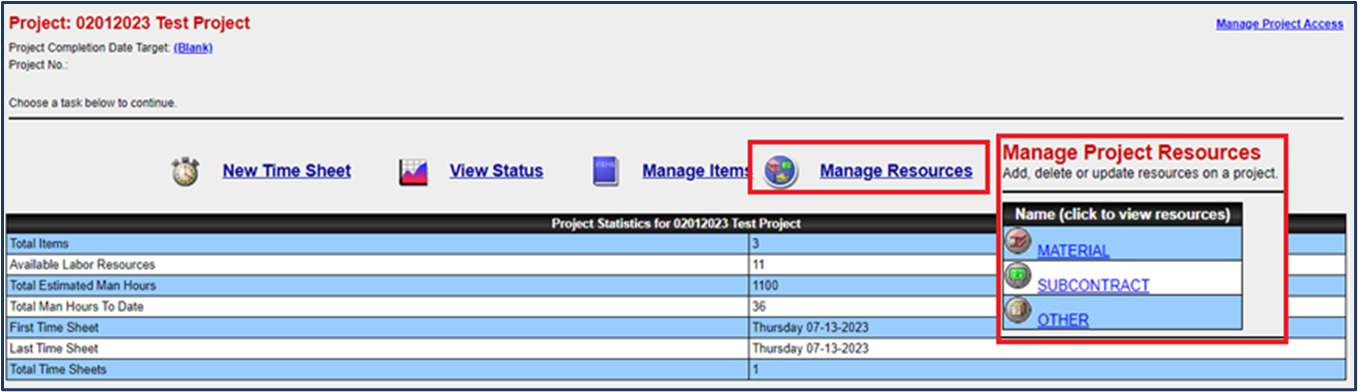
The equipment list is universal to all projects in Field Link. This list can be managed from the Admin>Manage Resources Menu.

Rental
The Rental Equipment list is universal to all projects in Field Link. This list can be managed from the Admin>Manage Resources Menu.

Material
The Material list is specific to the project. Material will be imported from Estimating Link when the project is submitted to Field Link.

Subcontractors
The Subcontractor list is specific to the project. Subcontractor work will be imported from Estimating Link when the project is submitted to Field Link.

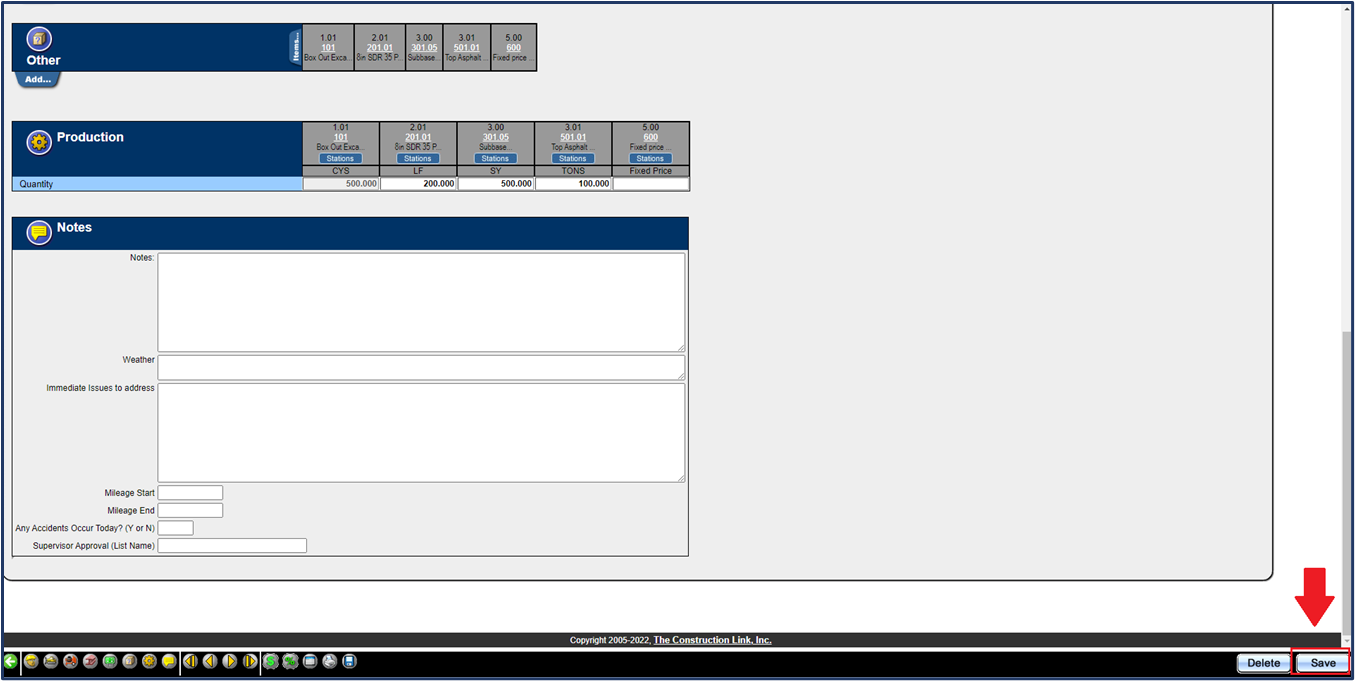
Other (Miscellaneous)
The Other list is specific to the project. Other (miscellaneous) work will be imported from Estimating Link when the project is submitted to Field Link.

🗒️Note: For non-Estimating Link projects that are imported from a spreadsheet: Material, Subcontractor, and Other resources can be manually entered "as you go" on the timesheet or can be entered in bulk from the Manage Resources menu in the main project page.
Step 7 - Enter Item Production on the Timesheet
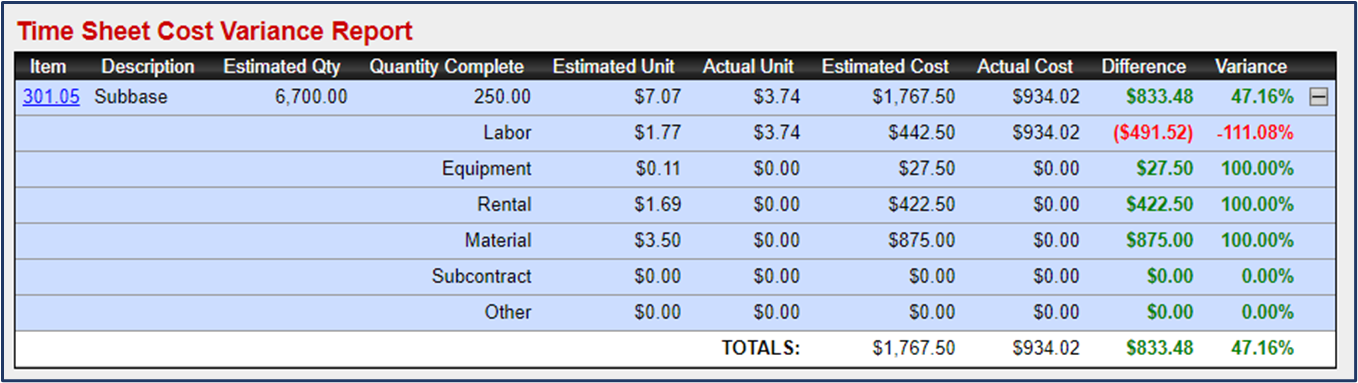
Enter in the completed quantities under each Item in the Production Section. These quantities are what calculate against your estimated quantities and calculate your numbers and percentages on your variance reports.

Step 8 - Enter Daily Notes on your Timesheet
Enter Daily Notes for the work completed for that project for that day.
💡Tip: To learn more about customizing your notes section, check out this helpful article: Create and Customize your Notes Sections.

Step 9 - Save your Timesheet
Click Save to save the time sheet.
Step 9 - Check your Variances for the Day
Click on the Variance icon ![]() at the bottom of the time sheet to see how you did today compared to the estimate.
at the bottom of the time sheet to see how you did today compared to the estimate.
💡Tip: If you do not want to track certain resources on your timesheets, you can disable those resources, and they will not show on your timesheets. Go to Admin>Manage Resources. Uncheck the box under "Enabled" beside the resource you do not want to track. Click Save.
