
Step by step by instructions on bringing your projects from Estimating Link Version 2 to Estimating Link Version 3
Prerequisites:
- You must have the newest version of Estimating Link 2 which is EL2.54
- Estimating Link Version 2 projects must have been opened and closed at least once in EL2.54
- You must have access to your backup files that you would like to import.
- You must have Estimating Link Version 3 installed on your computer.
Step 1
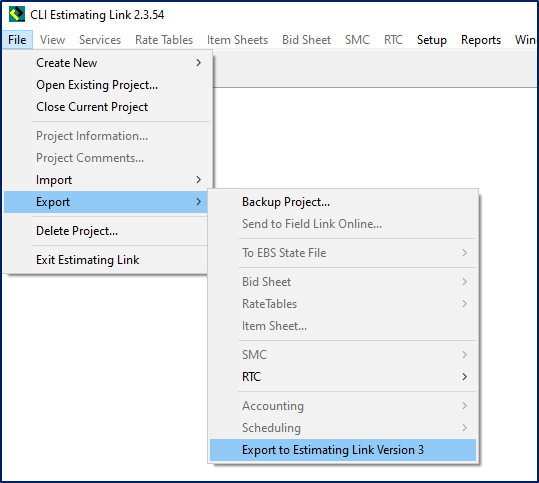
Open the latest version of Estimating Link 2 (2.54). Click on File > Export > Export to Estimating Link Version 3:
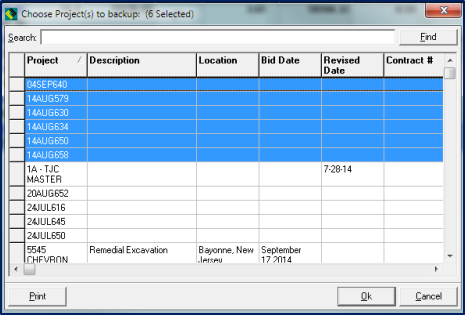
Pick a range of projects or an individual project to bring the project(s) up to the current version of EL2:
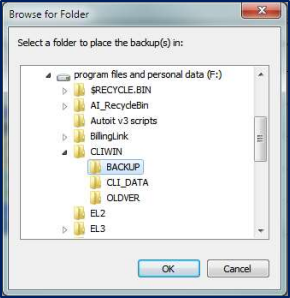
It will then ask you to save them to your default backup directory.
🗒️Note for Estimating Link Enterprise or Pro Server Customers: If you are going to put these projects on a server, make a network folder/directory on the server where you will save/backup the files.
🗒️Note for Estimating Link Online Customers: Save all your projects somewhere you can easily find them on your local PC (We recommend your desktop). You will copy these files onto your Virtual Desktop.
If you are going to put these projects on a server, you should make a directory on the server to back them up to. Click OK.
This will open each project in the current version and back it up to the destination folder.
When finished, you should be able to import the project into Version 3.0 using the Import Restore project function in Version 3.0.
⚠️ Additional Step for Estimating Link Online Customers:
Once you have completed these steps and saved all your projects, you will copy and paste these projects to your Virtual Desktop. You will see a folder on your Virtual Desktop where you can paste your EL2 Projects so they can easily be imported into your new version of Estimating Link.
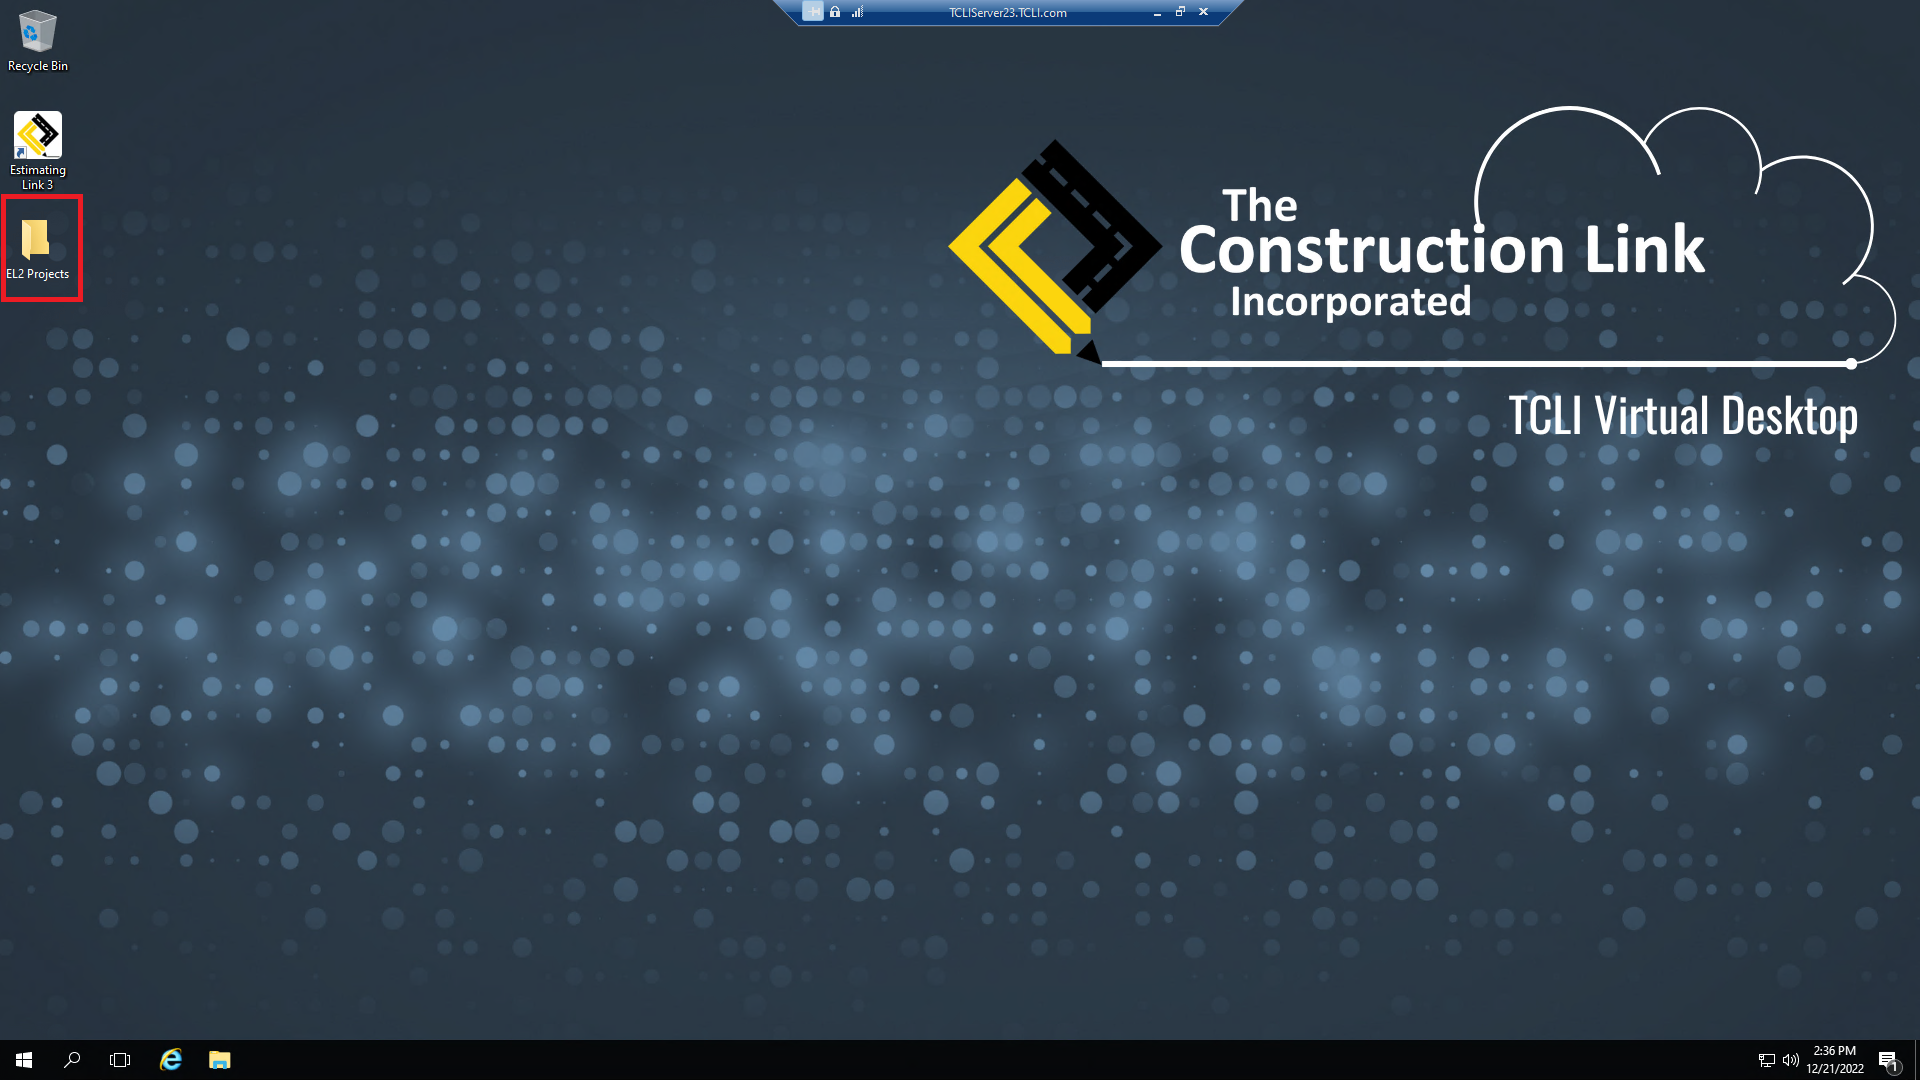
Simply copy all your projects you just saved on your local PC, then navigate to your Virtual Desktop, open the desktop folder labeled "EL2 Projects", and paste the projects into the folder.
Step 2:
Close Version 2.0 and Open Version 3.0 (either on your PC or Virtual Desktop)
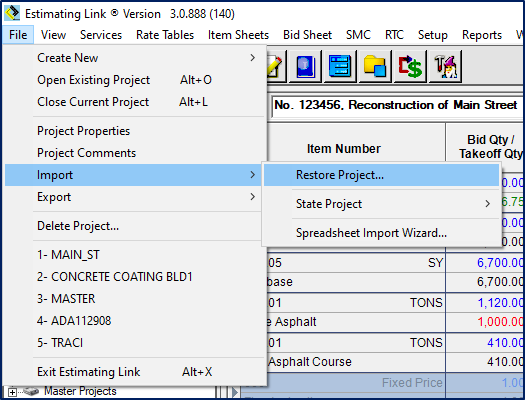
Click on File > Import > Restore project:
Go to the folder/directory where you stored the Version 2.0 projects.
Select a range or individual project/s to bring into the Version 3.0 database.
Please note that the Project Date field has changed in Version 3.0 to Date format and may require you to re-enter the date for a project that in version 2.0 didn’t conform to the proper date format.
This will be displayed as the projects are loaded into version 3.0 Once the projects are restored in the new database, all the users pointed to that database will have access to those projects.
If we can be of further assistance, please reach out to us at anytime: (800) 448 - 0741 or Support@TCLI.com.