Prerequisites
- Must be an authorized user to change company configuration on Field Link. By default, this is this is users with Administrative privileges.
System Options
System Options in Field Link are settings that affect the entire system for your company.
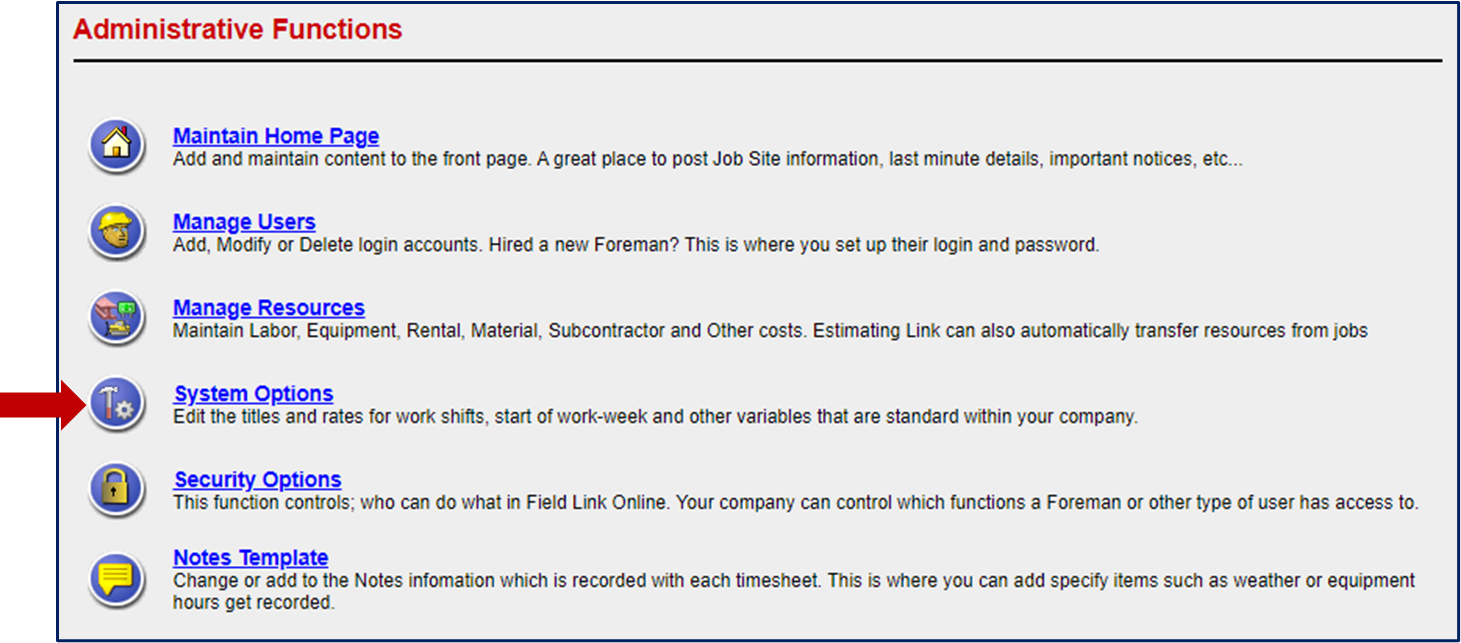
To navigate to these settings, click Admin in the main navigation bar, then select System Options:
System Options Window
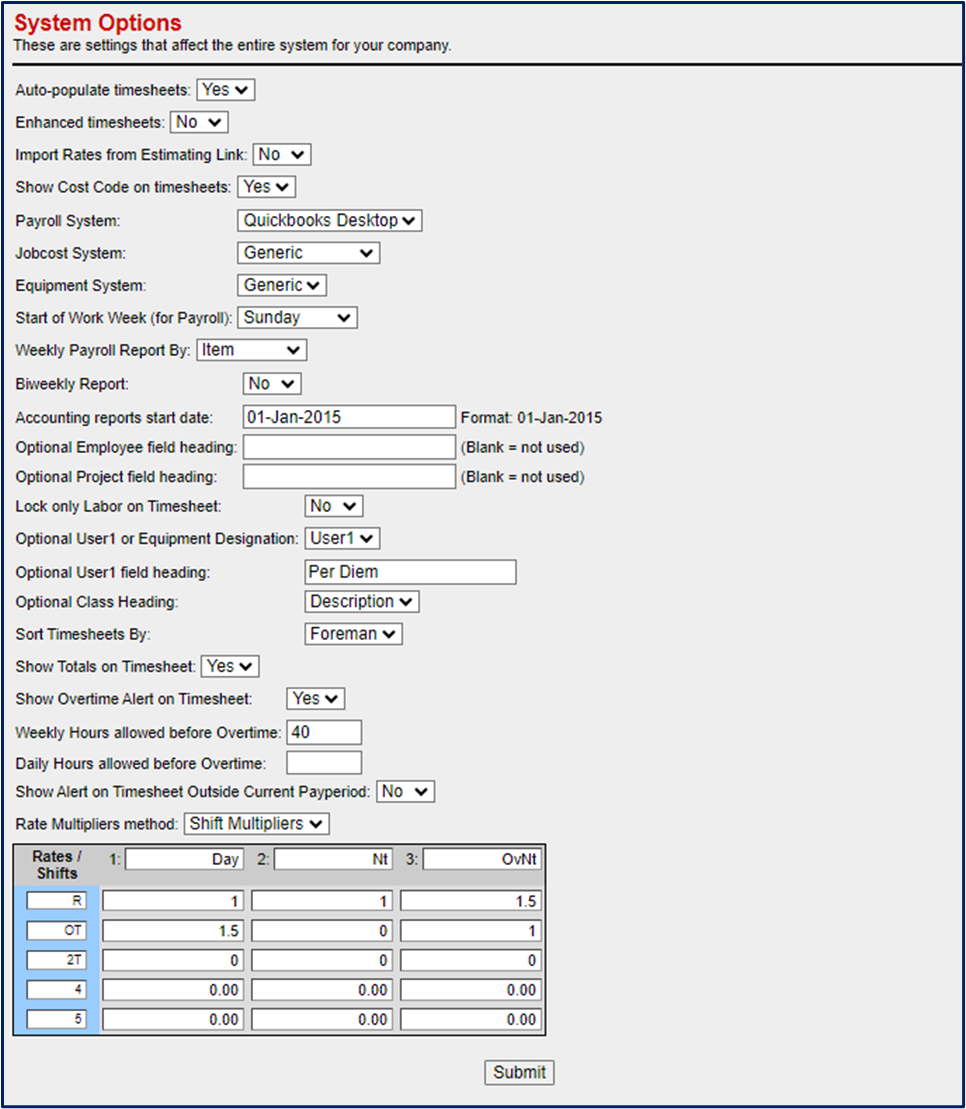
Once accessed, the System Options window will appear:
Auto-Populate Timesheets
- No (Default): resources from Estimating Link will not auto-populate on the timesheets.
- Yes: Each timesheet will automatically populate with the labor classes and resources from your estimate that correspond to the Items selected on the timesheet. It is recommended to keep the default setting of "No" until you are familiar with using Field Link.
Enhanced Timesheets
- No (Default): no scroll bars on the timesheets.
- Yes: adds scroll bars to the timesheets. Gives better visibility to items when you have a large quantity of items on a single time sheet.
Import Rates from Estimating
- No (Default): This setting means Labor, Equipment, and Rental rates are not automatically brought in from Estimating Link. Keeping this default setting allows you to maintain your Labor, owned equipment, and rental equipment rates separate from your estimated rates. You would set up your Field link rates manually or via a spreadsheet import.
NOTE: Labor, Equipment (owned) and Rental Equipment are considered company resources and can be used on any project. Those resources are listed under "Admin>Manage Resources."
- Yes: Allows Labor Classes (i.e. foreman, laborer, etc) used in the Rate Tables of Estimating Link to be imported and automatically added to your Labor Classes in Field Link (Admin>Manage Resources>Labor>Classes). Note: If your rates change on projects for the same unique rate code, they will be updated in your Field Link resource tables to the latest change but will not change previous projects submitted to Field Link.
Show Cost Code on Time Sheets
- No (Default Setting): Item Cost Code from the Estimating Link on the Time Sheet Item column.
- Yes: Item Cost Codes from Estimating Link will display on the Time Sheet Item column. The Item Cost Code can also be changed or added in Field Link by going to "Manage Items" inside a project's main project page, clicking on the Item Link, and adding the cost code in the "cost code" entry field.
Payroll System
The default is "Generic" and can be used for most accounting exports, including QuickBooks. The selection changes the layout and data on the Payroll Report and the Payroll Data Export File you will send to your accounting program. Choose from Generic, Computer Ease, Computer Guidance, TreLine, AllPay, Sage 300, Sage Fixed Format, ViewPoint, Foundation, and Job Power. Note: If your accounting system is not available and does not work with the "Generic" export file, please reach out to support@tcli.com
Jobcost System
Creates an export file (.csv) for accounting systems. It reports the quantities entered on a timesheet for each item in a pay period.
Equipment System
This option is available upon request if you need an equipment hours export file for your accounting system.
Start of workweek (for Payroll)
Default: Sunday. Select the day of the week that your payroll starts.
Weekly Payroll Report By
- Item: The Item # will be used to display and categorize your employee's time on the payroll report
- Cost Code: The Cost Code will be used to display and categorize your employee's time on the payroll report
Biweekly Report
- No (Default): payroll reports will be weekly
- Yes: payroll reports will be bi-weekly
Accounting reports start date
This is not an option that needs to be changed.
Optional Employee field heading
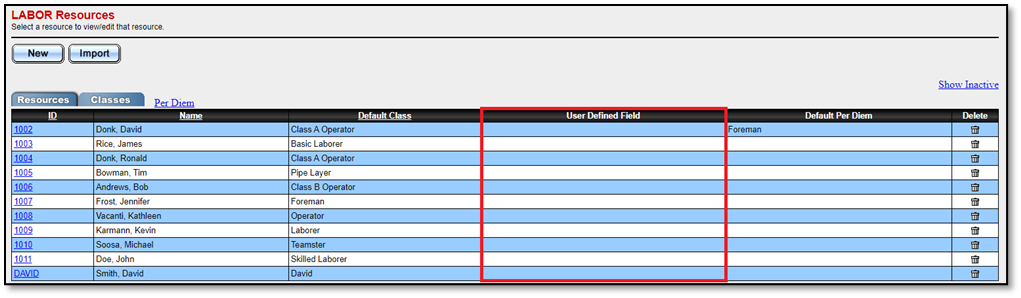
This option allows you to add a customized entry field to your labor resources (Admin > Manage Resources > Labor). If it is blank, it will not be used/visible:
Optional Project field heading
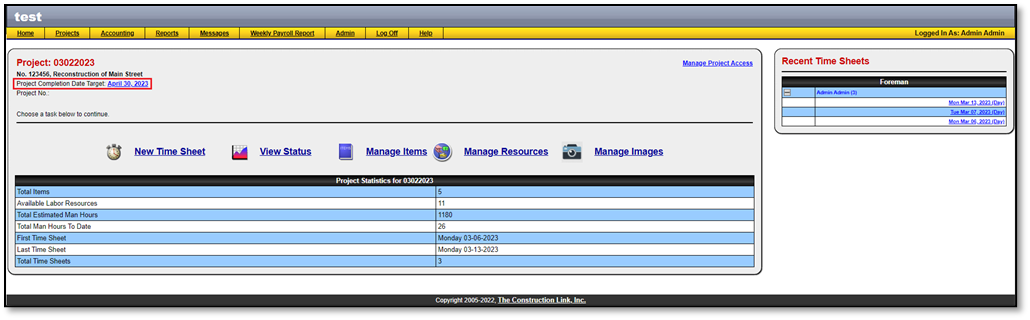
This option allows you to add a customized entry field to your Project Description on the main project page. In the example below, a project completion target date has been added to the project description.
Lock only Labor on Time Sheet
- No (Default): Locks all timesheet entries including labor once payroll is submitted.
- Yes: Allows equipment, rental, material, subcontractor, other, and production to be editable on timesheets after payroll is submitted. Labor is locked.
Optional User1 or Equipment Designation
- Equip (Default): This option allows you to assign a piece of equipment to a laborer on the timesheet
- User 1: This option allows you to create a customized field on the timesheet to attach to an employee. This is commonly used to add Per Diem to timesheets. To change the label, use the "Optional User1 Heading" (below).
Optional User1 Heading
This works in conjunction with the "Optional User1" option as listed above. Add your heading to the additional field for employees on timesheets. This is commonly used as Per Diem.

Optional Class Heading
- ID(Default): Displays the Labor Class ID on the payroll report.
- Code: Displays the Labor Class Code on the payroll report.
- Description: Displays the Labor Class Description on the payroll report.
🗒️Note: this change is only made on the payroll report under the "Accounting" menu.

It does not change the "Weekly Payroll Report" on the main menu. The Class Description is displayed on the "Weekly Payroll Report" and cannot be changed.
Sort Time Sheets by
- Foreman (Default): This places the Foreman at the top of each timesheet and payroll report.
- Date: This orders the timesheets and payroll report by date.
Show Totals on Timesheet
- Yes (Default): Each timesheet will display the period total hours for each employee for the pay cycle.
- No: Each timesheet will not display the period total hours for each employee for the pay cycle.
Show Overtime Alert on Timesheet
- Yes (Default): works in conjunction with the setting "Weekly Hours allowed before overtime" or "Daily Hours allowed before Overtime". Field Link will notify the user if the hours entered on a single timesheet are greater than the hours allowed before overtime.
- No: Field Link will not notify the user if they enter hours greater than the hours allowed before overtime on a single timesheet.
Weekly Hours allowed before Overtime
Allows you to enter the total weekly hours allowed before overtime for a single time sheet. If you work in states that require overtime to be paid after a required amount of regular time, you will use this functionality. Example: Overtime is required in your state after 40 hours per week. You would set this option to "40".
Daily Hours allowed before Overtime
Allows you to enter the total Daily hours allowed before overtime for a single time sheet. If you work in states that require overtime to be paid daily after a required amount of regular time, you will use this functionality. Example: Overtime is required in your state after 8 hours per day. You would set this option to "8".
Show Alert on Timesheet Outside Current Pay period
- Yes (Default): if a user attempts to create a timesheet outside the current pay period, they will receive a warning before proceeding.
- No: the user will not be alerted if they attempt to create a timesheet outside the current pay period.
Rate Multipliers Method
The Rate Multiplier method determines the way regular, overtime, and other labor rates are calculated.
Shift Multipliers (Default): Field Link will use the table figures to determine the rate for the designated shift. The default figures/calculations are shown in the screenshot below. All entry boxes in shift multipliers can be changed, including the Rate Descriptions and Shift Descriptions.
For example: Rates 4&5 could be changed to SHOP and TRVL (travel).

IMPORTANT: If you are importing your rates from Estimating Link, you MUST use Shift Multipliers to properly calculate overtime and other rates!
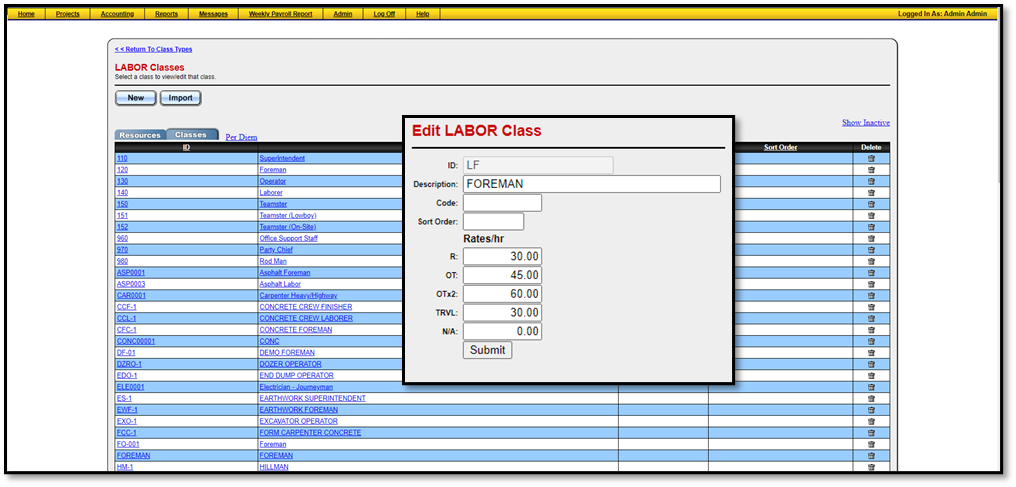
Class Table: Field Link will use the rates assigned to each Labor Resource using the headings listed in the Rate/Shift column. This option is typically used when you are managing your Field Link rates separately and are not importing rates from Estimating Link. Rates will need to imported from a spreadsheet or manually entered. To enter your rates, go to Admin > Manage Resources > Labor
If you need any assistance with Field Link setup, call us at 800-448-0741 or email our friendly support team at support@tcli.com.