
Step-by-step guide to move an Estimating Link Database from one SQL server to another SQL server
To migrate the Estimating Link database (TCLIdb) from one SQL server to another on a different machine, the installer must be familiar with SQL Server permissions and setup processes.
If the SQL server hosts other databases, TCLIdb can be installed within the existing server instance. However, for optimal performance, we recommend setting up TCLIdb on a separate SQL instance. This setup requires re-installing SQL Server and creating a new instance, typically named "TCLI," with dedicated memory allocation. In this guide, we’ll assume that the new SQL server (New Server) will be used exclusively for TCLIdb.
🗒️Note: This operation requires an experienced technician with knowledge in SQL Command Line Queries and Management Studio. This document serves as a guide to assist in the process.
Prerequisites:
- Confirm you have administrative privileges on both servers.
- Have your company ID (TCL ID) and password ready.
- Install Estimating Link Server Configuration Tool on both the old and new server.
- Install Microsoft SQL Management Studio on the new server.
- Ensure no users are on the old server by stopping the SQL service (SQL Server (TCLI)).
- If using a Terminal Server, update Estimating Link to the latest version.
Step 1 - Install Server Configuration Tools
Download and install the latest Estimating Link Server Configuration Tools (Setup_Server.exe) from the Estimating Link Downloads page onto the old server. It may already be installed.
Step 2 - Backup Old Server
Once installed, open the Server Configuration Tools program and select Backup Database

The backup file will be saved on the old server at C:\Program Files (x86)\Microsoft SQL Server\MSSQL12.TCLI\MSSQL\Backup and named similarly to TCLIdb_YYYYMMDD_HHMM.bak.
Locate the backup file, then transfer it to a network drive accessible by the new server.
Step 3 - Create Database on New Server
Download and install the latest Estimating Link Server Configuration Tools on the new server.
- If SQL Server 2014 is not already installed, use
Setup_Server_wSQL2014.exe, which includes both the Configuration Tool and SQL Server 2014. - If you’re using a different SQL version, download and install
Setup_Server.exeinstead.
- Open the Server Configuration Tool

- Click Create Database

- Type in TCLIdb as the Database Name and press OK

After creating the blank database, exit the Server Configuration Tool to proceed with the next steps.
Step 4 - Delete Blank Database On New Server
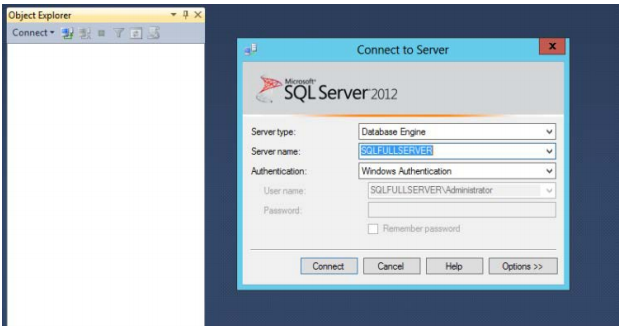
Open SQL Management Studio by pressing Windows + R, typing SSMS.exe, and pressing Enter, or by clicking the SQL Management Studio icon and login with your SQL credentials.
- Expand Databases on the lefthand side

- Right Click on TCLIdb and select Delete

- Click OK

Step 5 - Restore Your Database On New Server
- Right Click on Database and then Restore Database in the sub-menu

- Choose Device and then click the ellipsis

- Click Add button

- Locate the backup file you created/transferred in Step 2. Select the file, and click OK

- Choose OK again

- Click Verify Backup Media, and confirm the backup file is valid

- Click Files, and then choose Relocate all files to folder.

- Go to General, Verify the Restore Checkbox is checked and click OK

- Wait while your database is restored.

- Verify the results of the restoration and click OK if successful

⚠️ Warning: If restoration fails, please contact our support team at 800-448-0741.

Step 6 - Add Permissions to New Database
- Expand Security, then Logins and select the user named cliwin3

- Right click on the cliwin3 user and select Properties

- Set the password to tcli4333% and press OK

Step 7 - Run 2 SQL Commands
- Select the TCLIdb database and click New Query

- Copy and paste the following text
Use TCLIdbALTER USER cliwin3 WITH LOGIN = cliwin3GO - Click Execute

- You should see a success message

- Click the X to close this query and select No

- Run a second query. Select New Query, copy and paste the text below, then click Execute.
ALTER DATABASE TCLIdb SET DISABLE_BROKER;ALTER DATABASE TCLIdb SET NEW_BROKER WITH ROLLBACK IMMEDIATE;ALTER DATABASE TCLIdb SET ENABLE_BROKER
This completes moving the database.
Step 7 - Point Workstations to New Server
You can now create a new connection on each workstation connecting to the New Server.
- In the Estimating Link Program on each client workstation, click on Setup, Options, Database and Add.
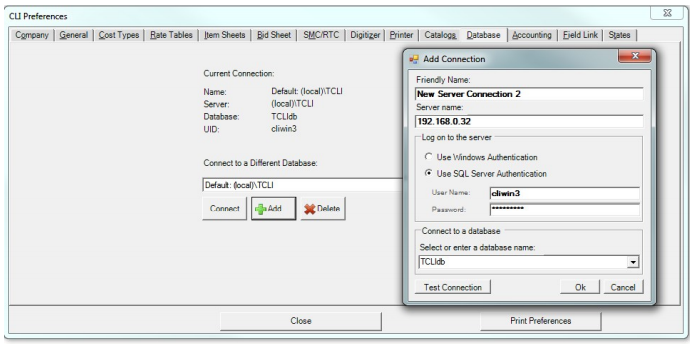
- Change the Server name to the New Server Name or IP address.
- Click on the Test Connection button to make sure it will connect.
- If successful, click OK. Click on the down arrow at the end of the database name field and select your new connection.
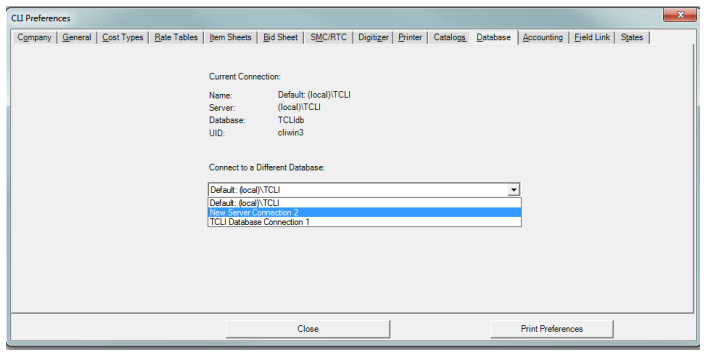
- Click on the Connect button. The program will close and restart using the new server database.
🗒️Note: You can check the database connection by clicking on Help and About to see the current connection.
💡Tip: You will have to do the previous step on each workstation that is connected to the server if the server name has changed.
If we can be of further assistance, please reach out to us at anytime: (800) 448 -0741 or Support@TCLI.com.