
Setup instructions and review of interface EL & Save 300 CRE Interface, with screenshots.
Estimating Link Setup
Setup Estimating Link to interface with Sage 300CRE.
Go to Setup > Options > Accounting. Add a checkmark to Sage 300:
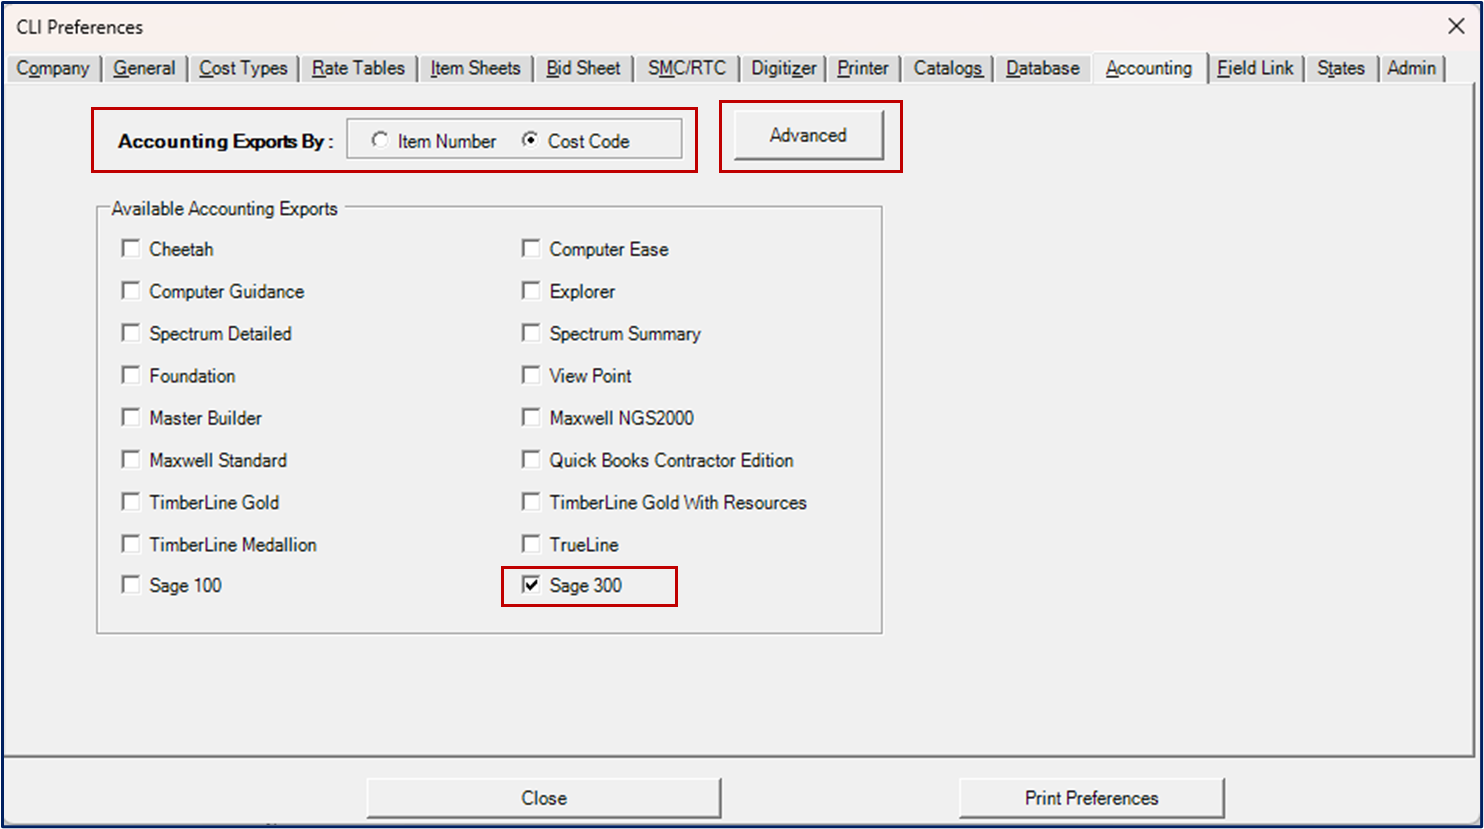
Select whether you would like your accounting export to be by Item Number or by Cost Code.
Note: Most accounting programs use Cost Codes. If Cost Codes is selected, each Item and Sub-Level Item will need to have a unique Cost Code.
Sage 300 also has options within the Advanced Accounting Options. On the CLI prefrences window (as shown above), click on Advanced. The Accounting Export Options window will appear as shown below:

Under the section Sage 300, you will see one option, Use Bid Quantity.
Most users will leave this option unchecked, to not Use Bid Quantity, because they want all costs based on the Take Off Quantity.
Cost Categories
You will need to ensure that your Cost Categories are consistent in Estimating Link and Sage 300CRE. You can change your Cost Categories in Estimating Link by going to Setup > Options > Cost Types.
On the left side of the window, you can change the UserCode to match your Sage 300CRE categories by clicking in the field as shown below:

Export from Estimating Link to Sage 300CRE
In Estimating Link, open the project you would like to export to Sage 300.
Click on File > Export > Accounting > Sage 300:

You will be prompted to enter a Project Number:

Enter your Project Number and click Ok.
Save your file to the desired location. The file will save with a file extension of .JCE. You will receive an informational window that your file has been saved successfully:

Click Ok.
Exported File
You can view your export using Notepad. Go to the location that you saved the export and open it with Notepad.
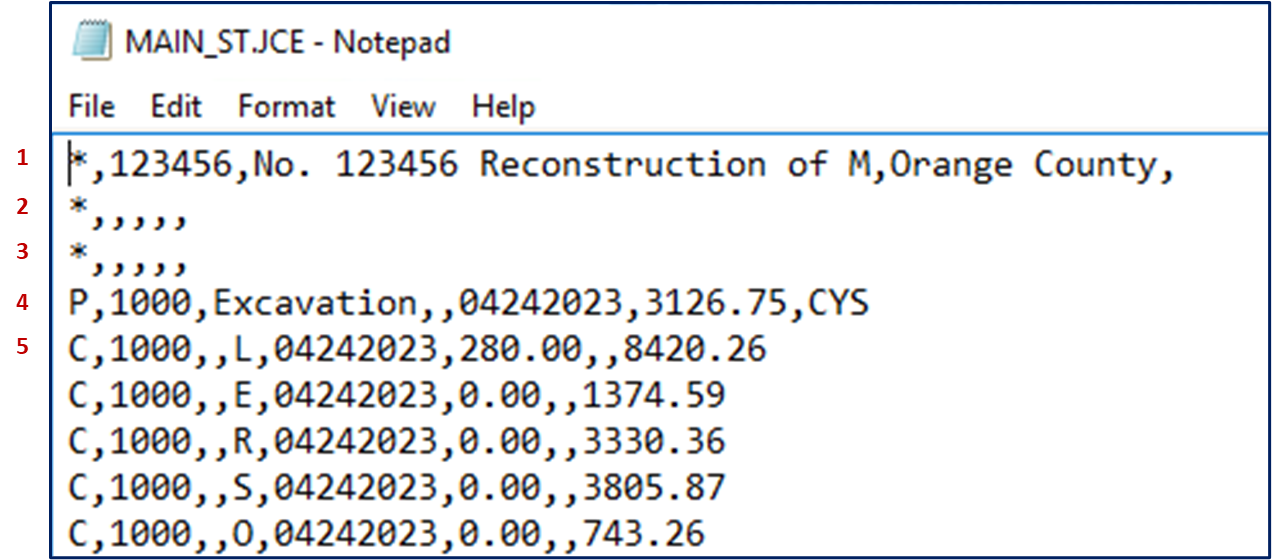
Your file should look similar to the below (the below is using MAIN_ST.):

Deciphering Exported File
Row 1
In the above example, the first row starts with an * and is what Sage 300 calls their job header. It is a record that contains the static information related to the project. This data in Estimating Link comes from the project number and project description.
Rows 2 & 3
The second and third rows are blank.
Row 4
Row 4 starts with a P. This is what Sage 300 calls their Production Unit Estimate and must start with the letter P.
SAGE: P, Cost code ID, Description, Blank, Transaction Date, Est. Production Units, production unit description
1000 Excavation Space 4/21/23 2800 CYS
EL: Item Cost code, Cost Code Description, Space, Date, Bid Quantity, Unit of measure
Row 5
Row number 5 starts the recorded costs of Labor, Equipment, Rental, Material, Subcontractor, Other and always starts with the letter C.
SAGE: C, 1000, Space, L, 04212023, 280.00, space, 8420.26
EL: C, Cost Code, Space, Labor Label, Date, Man Hours, space, Labor Cost for Excavation based on Bid Quantity if selected in advanced options, otherwise, it will use the Take off quantity.
This format for C costs is used for any item cost such as Labor (L), Equipment (E), Rental (R), Material (M), Subcontractor (S), Other (O).
Note that the labels L,E,R,M,S,O, can be changed to is a different letter combination in the Setup, Options, Cost Types, User Codes.